How to build and execute on FlexPendant |
Following are the necessary requirements for running the Sample application on a virtual or a real FlexPendant.
Install RobotWare 5.14 or above and RobotStudio 5.14 or above. The complete DVD image is available for free download at the Community at:
http://www.abb.com/product/ap/seitp327/049ffeb82687791ec12574b9004958cf.aspx
Create a simple test system using RW 5.14 or above in RobotStudio System Builder. Make sure you include the RW option FlexPendant Interface.
The SignalBindingSource in the application’s Test view depends on the existence of 9 do signals and will not work without these:
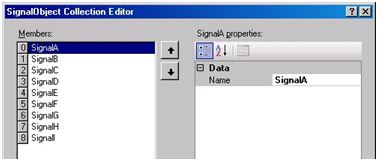
 Note
NoteA Digital Output named doActive is also necessary.
In FlexPendant ControlPanel – Configuration load the included cfg file, which creates all the signals needed.
Create RAPID data as specified:
Global Persistent RAPID data "simulated" of data type "bool" in task "T_ROB1" "user" module". Initial value: false.
Global Persistent RAPID data "cycles" of data type "num" in task "T_ROB1" "user" module". Initial value: 0.
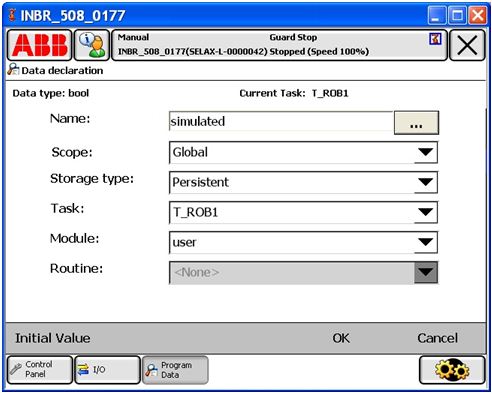 Note
NoteStorage type must be Persistent!
Load the enclosed RAPID program ‘SamplePrg’.
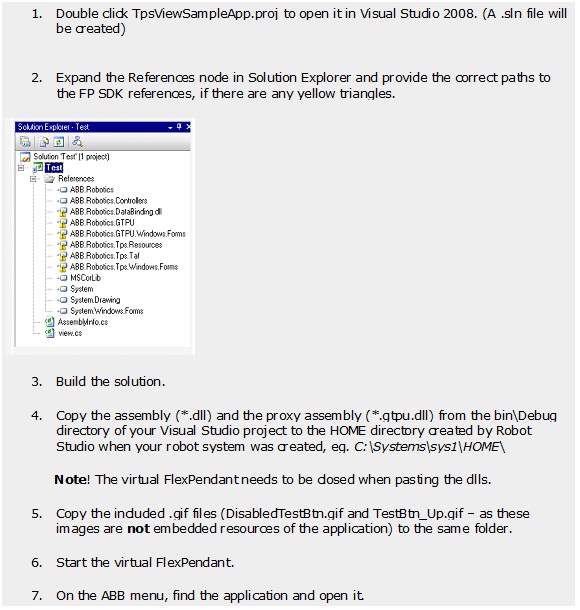
Build the sample application and have it started on the FlexPendant.See procedure below:
Set up and use the Visual Studio debugger to step through the code as it executes on the virtual or real FlexPendant, i e set a breakpoint in the event handler of a UI Button for example and see what happens when you click it. See User’s Guide and the User Forum to find out how to test and debug a FlexPendant application.
Custom Views sample application walkthrough is available for information about how the application works and for hints about what you may learn by studying the code.
Custom Views sample application is available for free download at:
Similar to Custom Views sample, there are other samples available in the Walkthroughs section.