Lights
RobotStudio provides advanced visualization options to display simulations with an added touch of realism. One of the most important options is the ability to add light sources to the stations using the Light class. This topic contains information regarding how to create and modify several light sources. The examples are shown in a pre-made station that contains bodies with different geometries and materials.
The steps in this topic are:
Add an infinite light source.
Add a spotlight and modify its parameters.
Add a point light and modify its parameters.

Important
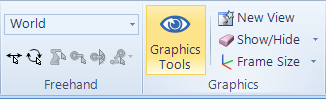
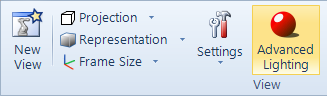
To visualize the light sources, enable Advanced Lightning from the Graphic Tools option, accessible from the Home tab.
Solution
To create a light source that illuminates from "infinitely far-away" in a certain direction, use the CreateInfiniteLight(Vector3) method. Several light parameters can be modified, such as the ability to cast a shadow in other objects or whether or not the light is enabled. Add the light source to the Lights of the current station to see it.
Station station = Project.ActiveProject as Station;

Light myInfiniteL = Light.CreateInfiniteLight(new Vector3(0.1, 0, -0.02));
myInfiniteL.CastShadows = true;
myInfiniteL.Enabled = true;
station.Lights.Add(myInfiniteL);  // add the light to the station
A spot light can be created with the CreateSpotLight(Vector3, Vector3) method to showcase special parts of the station. This light source illuminates only depending on its position and orientation, as well as the other parameters like its radius and illumination length.
Light mySpotlight = Light.CreateSpotLight(new Vector3(0, 0, 1), new Vector3(0, 0.5, -1)); mySpotlight.CastShadows = true; mySpotlight.Enabled = true; mySpotlight.Name = "spotlight"; // RobotStudio UI name station.Lights.Add(mySpotlight);.")
In the last snippet, the Name of the light source is also modified. This name appears in RobotStudio's UI and, while it is not mandatory, it's usage is recommended.
Point lights originate from a specified point in space and illuminate in all directions. In the following snippet, we also modify an important parameter: <xref:System.Drawing.Color> .
Light myPointL = Light.CreatePointLight(new Vector3(0 ,0 ,0)); myPointL.Enabled = true; myPointL.Color = Color.Red; // change the color station.Lights.Add(myPointL);.")
Example
The complete code for this example is shown below:
private static void LightDemo()
{
    Station station = Project.ActiveProject as Station;

    Light myInfiniteL = Light.CreateInfiniteLight(new Vector3(0.1, 0, -0.02));
    myInfiniteL.CastShadows = true;
    myInfiniteL.Enabled = true;
    station.Lights.Add(myInfiniteL);  // add the light to the station

    Light mySpotlight = Light.CreateSpotLight(new Vector3(0, 0, 1), new Vector3(0, 0.5, -1));
    mySpotlight.CastShadows = true;
    mySpotlight.Enabled = true;
    mySpotlight.Name = "spotlight";   // RobotStudio UI name
    station.Lights.Add(mySpotlight);

    Light myPointL = Light.CreatePointLight(new Vector3(0 ,0 ,0));
    myPointL.Enabled = true;
    myPointL.Color = Color.Red;       // change the color
    station.Lights.Add(myPointL);
}
Required Namespaces
ABB.Robotics.RobotStudio.Environment
ABB.Robotics.RobotStudio.Stations