Adding support for several languages |
This chapter provides the information needed to localize a customized application. The FlexPendant has built-in support for localization, and the mechanisms used by the standard FlexPendant applications can also be used by FlexPendant SDK applications.
This enables customized applications to be presented in the active language of the FlexPendant, that is, the language selected in the standard view Control Panel-Language.
For this to work the texts displayed in the customized application must be translated and the application localized as described in this chapter.
Get startedDevelop the application using English as the default language. The recommendation is to design, implement and test the application before adding support for other languages. To localize a FlexPendant application carefully complete each procedure of this chapter.
A method is needed to handle localization when new application functionality is added. |
This procedure sets up a separate project for the user interface texts.
Step | Action | ||||||
|---|---|---|---|---|---|---|---|
1 | Create a new project in the solution. Choose a Smart Device-Windows CE 5.0- Empty Projectand name the project <YourAppName>Texts.
| ||||||
2 | In the Texts project add a reference to System (.Net). | ||||||
3 | Set the Output type to Class Library (this is done in the Project Properties). | ||||||
4 | The namespace used for the Texts project must be the same as used for the main project. As the namespace is not visible in the resource file you must change it in the Project Properties like this:  | ||||||
5 | Add a Resources file to the project by right clicking the project in Solution Explorer and selecting Add New Item. Set the name of the file to “Strings.resx". This file will contain the texts of the default language (normally English). | ||||||
6 | Open the resource file and add name and value for the texts of the default language. Use capital letters in the name column. 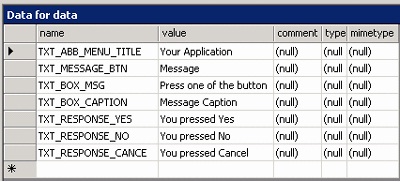 | ||||||
7 | In the Texts project create a folder with the culture short form as name, for example de for German and for sv Swedish. 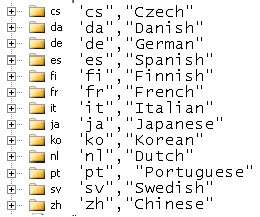
| ||||||
8 | Copy the “strings.resx” file to the folder(s) created in the previous step. | ||||||
9 | The name of the file used for the foreign resources should be .<culture>.resx,, for example “strings.sv.resx" as in the following screenshot. Right click the file and rename it. 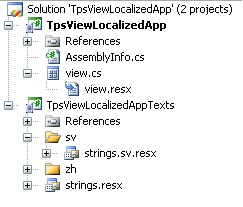 | ||||||
10 | Open the resource file and translate the texts in the value column. The name is the identity of the text and should remain the same.
|
Follow these steps to add localization to your main project:
Step | Action | ||
|---|---|---|---|
1 | Add a reference to ABB.Robotics.Taf.Base in the main project. | ||
2 | In the TpsView attribute of the view class insert the name of the Texts dll like this: [assembly: TpsView("ABB_MENU_TITLE_TXT","tpu-Operator32.gif","tpu-Operator16.gif", "TpsViewIRC5App.dll", "TpsViewIRC5App.TpsViewIRC5App", StartPanelLocation.Left, TpsViewType.Static,"TpsViewLocalizedAppTexts.dll", TpsViewStartupTypes.Manual)] | ||
3 | Declare a TpsResourceManager object at the top of the class as a private member variable and initialize it in the constructor.Add a call to an InitializeTexts method.
                //declaration
                private ABB.Robotics.Tps.Resources.TpsResourceManager _tpsRM;
                //constructor method
                _tpsRM = new ABB.Robotics.Tps.Resources.TpsResourceManager("TpsViewLocalizedApp.strings", ABB.Robotics.Taf.Base.TafAssembly.Load("TpsViewLocalizedAppTexts.dll"));
                InitializeComponent();
               InitializeTexts();
| ||
4 | Implement InitializeTexts(). Use the TpsResourceManager object and call GetString() using the identity (name) of the text you want as argument. Depending on the active language of the FlexPendant this call will retrieve the corresponding language resource.Example:Leave the contents of the method as it is, for example and so on. Example
                InitializeTexts()
                {
                this.Label1.Text = _tpsRM.GetString("TXT_INSTR_LABEL");
                }
Leave the contents of the InitializeComponent method as it is, for example Label1.Text = "Signals" and so on. | ||
5 | The TpsResourceManager object has not yet been created when the application icon and title are to appear in the ABB menu, and therefore another technique must be used to have them correctly displayed. Add a resource name for the application title and a value in the resource file of each language. In the TpsView attribute the first argument is the application title. Replace it with the resource . It may look like this: [assembly: TpsView("ABB_MENU_TITLE_TXT", ...,... TpsViewIRC5AppTexts.dll")] The corresponding resource value will now be used. In case no resource is found the name will be used as is. |
Follow these steps to create a satellite assembly of the localized resx file:
Step | Action | ||
|---|---|---|---|
1 | The localized resource file should not be built with the ordinary build process, that is, the property Build Action should be set to “None". Right click on the strings.<culture>.resx file and select properties: 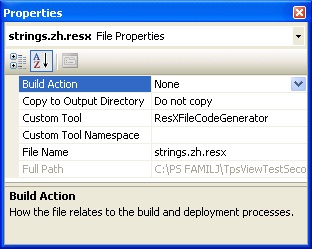 | ||
2 | You should now use the Visual Studio 2005 tool regen.exe to compile the resx file to a binary resource. After this the Visual Studio 2005 assembly linker tool al.exe should make a satellite assembly of the binary resource. Read the following steps very carefully to make sure the satellite assembly is built correctly.
| ||
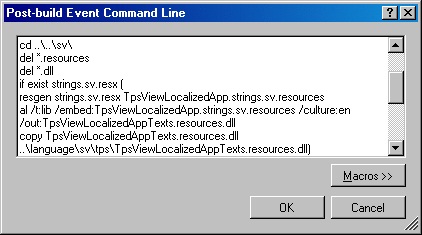
3 | Create a post-build event in the Texts project in order to automate the building process. Example: TpsViewLocalizedApp with resources in Swedish:
                mkdir ..\..\language
                mkdir ..\..\language\sv
                mkdir ..\..\language\sv\tps
                cd ..\..\sv\
                del *.resources
                del *.dll
                if exist strings.sv.resx (
                resgen strings.sv.resx TpsViewLocalizedApp.strings.sv .resources
                al /t:lib /embed:TpsViewLocalizedApp.strings.sv.resources /culture:en /out:TpsViewLocalizedAppTexts.resources.dll
                copy TpsViewLocalizedAppTexts.resources.dll ..\language\sv\tps\TpsViewLocalizedAppTexts.resources.dll)
The resgen command is written like this: resgen strings.<culture> .resx <Namespace> .strings.<culture>.resources where <culture>should be replaced with the correct language short form and <Namespace>should be replaced with the application namespace. The al command takes the resulting dll located in the same directory as the resx file and makes a satellite assembly of it: al /t:lib /embed:<Namespace>.strings.<culture>.resources /culture:en /out:<AssemblyNamee>.resources.dll
| ||
4 | It is necessary to ensure that the post-build step is executed with the correct versions of regen.exe and al.exe. The easiest way to do this is to use a Visual Studio 2005 Command prompt to build the project (or solution) or to start Visual Studio from that prompt. First click Windows Start menu to launch the Command Prompt (at Programs > Microsoft Visual Studio 2005 > Visual Studio Tools). Then use the command devenv in order to start Visual Studio 2005. Now open your solution and build it. The post-build command is now guaranteed to execute with the correct settings. Now open your solution and build it. The post-build command is now guaranteed to execute with the correct settings. 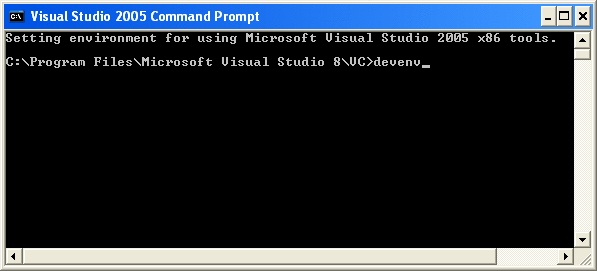
|
In order to test a localized application, the resources must be correctly organized in the file system of the controller. This should be done in the same way either the test is done on a virtual or a real FlexPendant. Follow these steps to test the application on a real FlexPendant:
Step | Action | ||
|---|---|---|---|
1 | Transfer, using an FTP client or the File Manager of RobotStudio, your application assemblies to the HOME directory of the active system. (TpsViewLocalizedAppTexts.dll, TpsViewLocalizedApp.gtpu.dll, TpsViewLocalizedApp.dll in the following screenshot). | ||
2 | Copy the language folder that was created by the post-build event to the HOME directory. 
| ||
3 | Verify that the language folder has folders for each language and that each tps folder have a .resources dll. If this is not the case, you need to go back to the post-build event of your Texts project and check what has gone wrong. 
| ||
4 | Switch to another language (Control Panel - Languages) and restart the FlexPendant. | ||
5 | Verify that the name of your application in the ABB menu is correct. | ||
6 | Open the application and verify that the GUI texts are correctly displayed. Especially verify that text boxes, labels, listview columns and so on. are wide enough to display the translated texts. |